Orientation
As described before, a person with some experience in Python programming creates a small, so-called system file that connects to the instrument drivers. To give a better idea of the required coding effort and the resulting instrument control, we will have a look at an example.
Required coding effort
We will have a look at system_dummy.py, which is part of this package.
"""Module defines a minimal system for testing and demonstration purposes."""

# a dummy device is used to make it runable
from matr1x.devices.dummy import dummy
from matr1x.system import System


class Dummy(System):
    """Dummy system for testing and demonstration purposes."""

    def __init__(self):
        """Initialize the dummy device and its measurement parameter."""
        super().__init__()
        self.dcdata["source"] = "dummy system for testing matr1x-matrix"
        # Device definition and configuration takes place here, but devices are
        # not yet opened.
        self.add_dev(
            "dev",  # name of device, must be unique
            dummy,  # device class, not instanced
            args=("TCPIP::localhost::10007::SOCKET",),  # arguments for init
            # {"timeout": 100, }  # kwargs can be given if needed
        )
        # The device class is instantiated as dummy(*args) when self.set() is
        # called upon start of the measurement.

        # define columns for measurement
        self.add_param(
            "dev p2",  # parameter name, must be unique
            "cnt",  # parameter unit for the data file header
            ["dev", "p2"],  # setter attribute/function is self.devs["dev"].p2
            ["dev", "p2"],  # getter attribute/function is self.devs["dev"].p2
        )
The dummy device driver is imported to mimic a device but to be able to run the example on any computer. Then, System is imported as the base class for the system definition. The file defines exactly one local System subclass, Dummy, which Matrix detects and instantiates. Metadata can be added using a subset of the Dublin Core vocabulary. In our example, only “source” is set. The imported dummy device is added to the list of devices and, finally, one Parameter is added to the system, which is used to read and write data from the device. Now, we can utilize this system-file in several ways.
No-Code instrument control
We can load the system file into the sweep generator and use it to control the device. This is shown in the screenshot below. 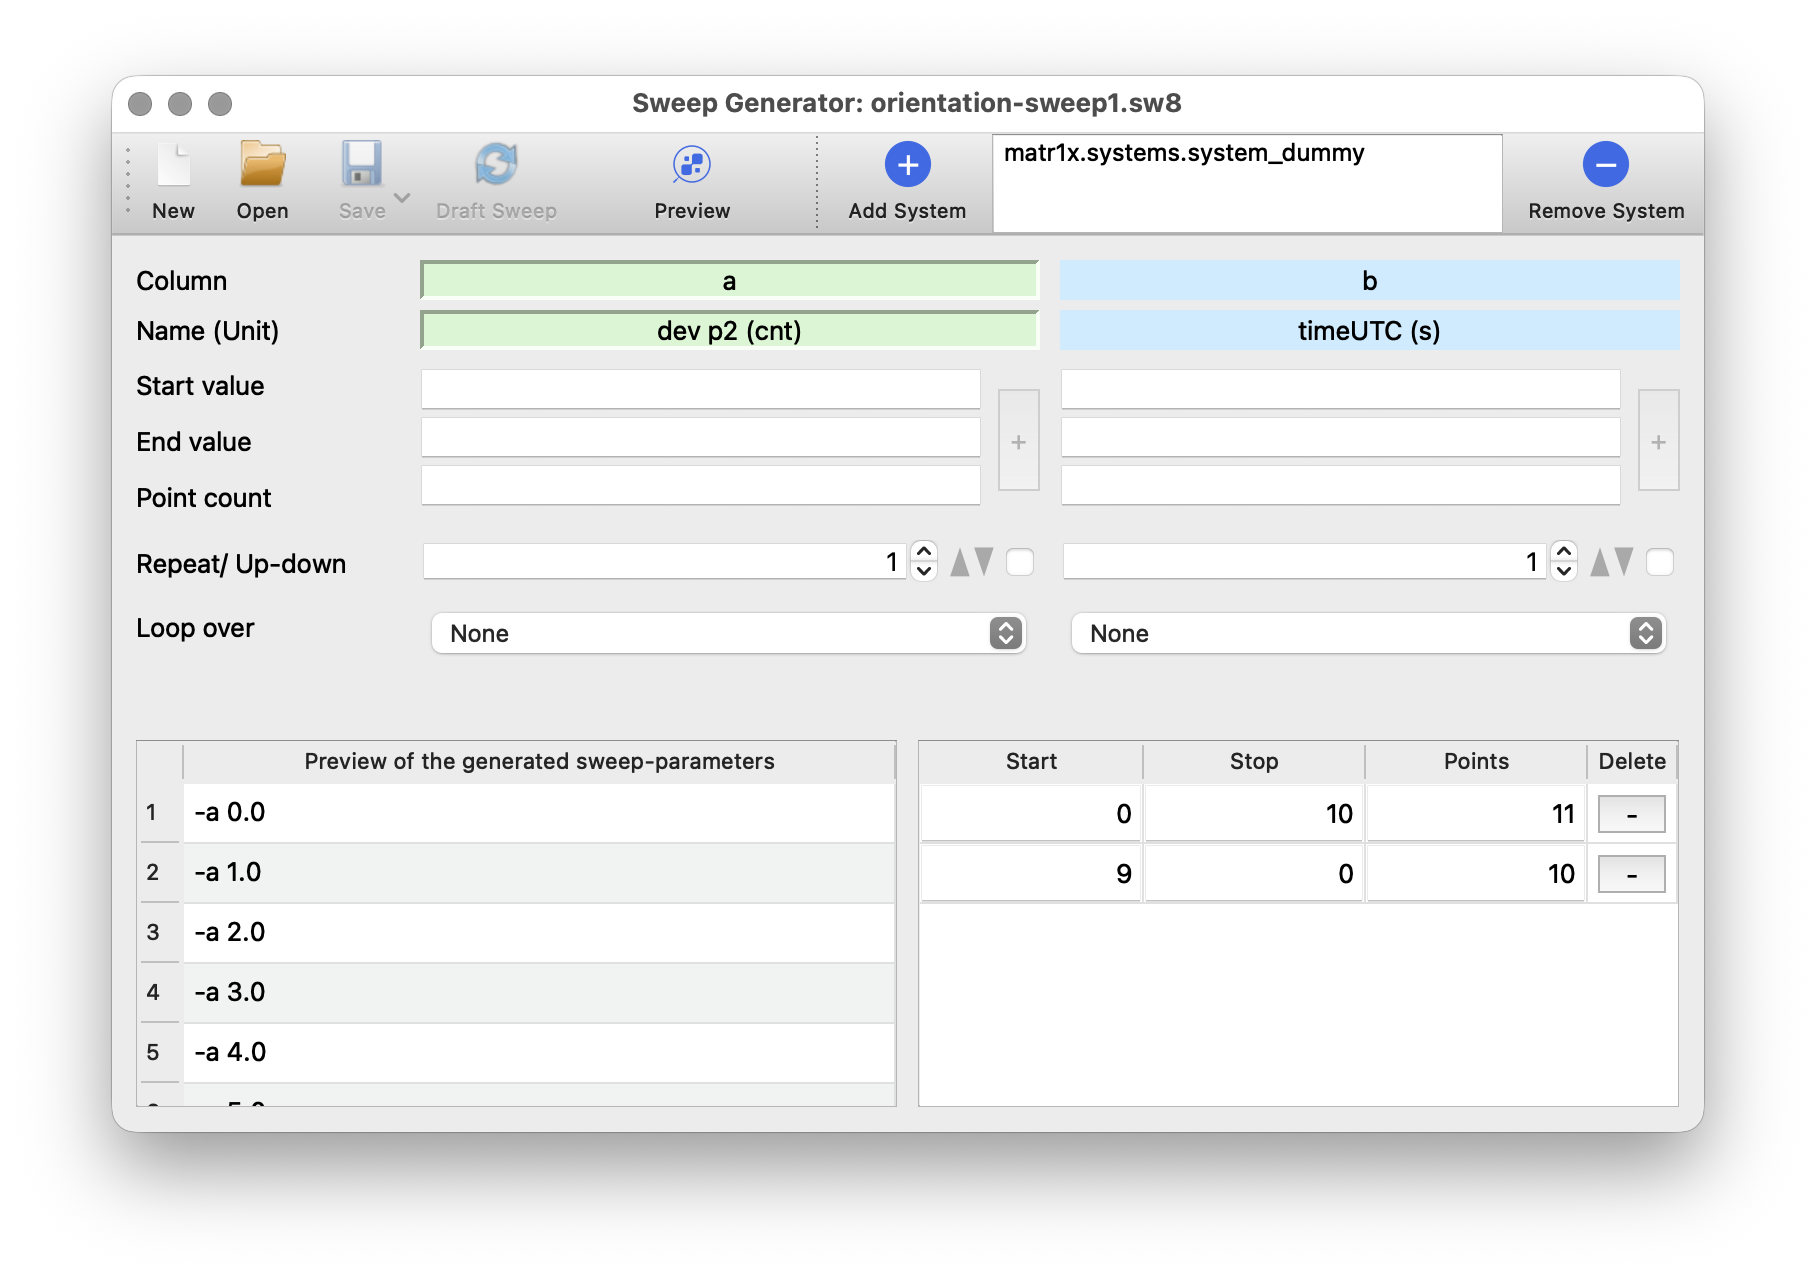 We added a sweep that starts at 0 and increases to 10 in steps of 1. Afterwards, we added a second sweep that starts at 10 and decreases back to 0 in steps of 1. In a real device, we could imagine a voltage source, where we could sweep the voltage from 0 to 10 V and back to 0 V. The sweep can be visualized utilizing the preview icon in the toolbar.
 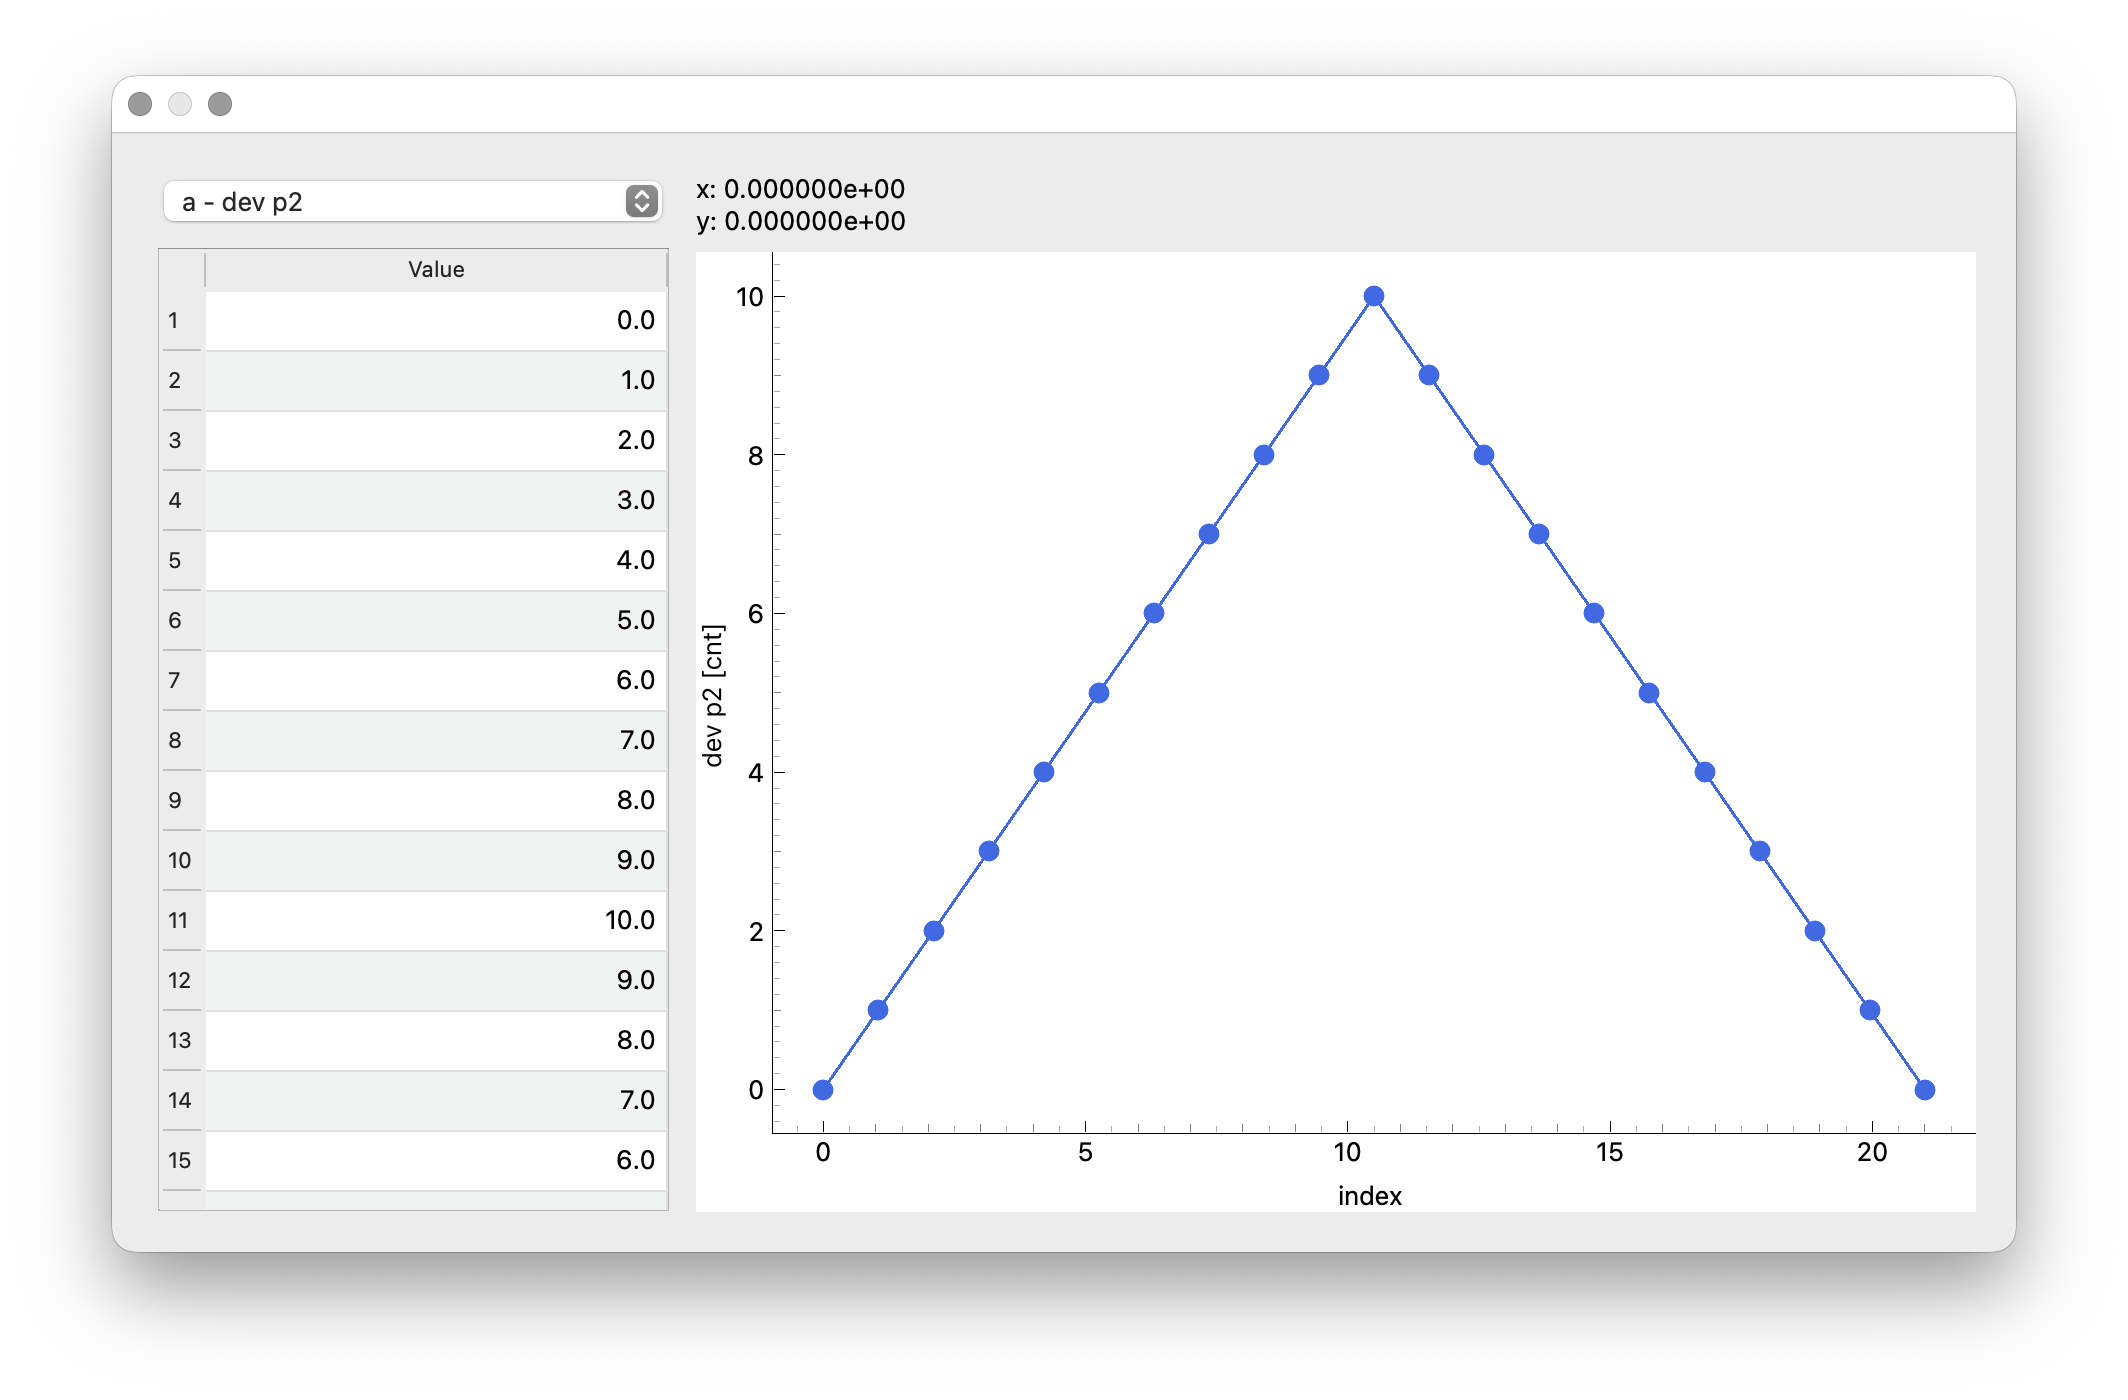 If we got the desired sweep, we can save it as a file. Afterwards, we can startup
 matrix-gui and can load this sweep file. 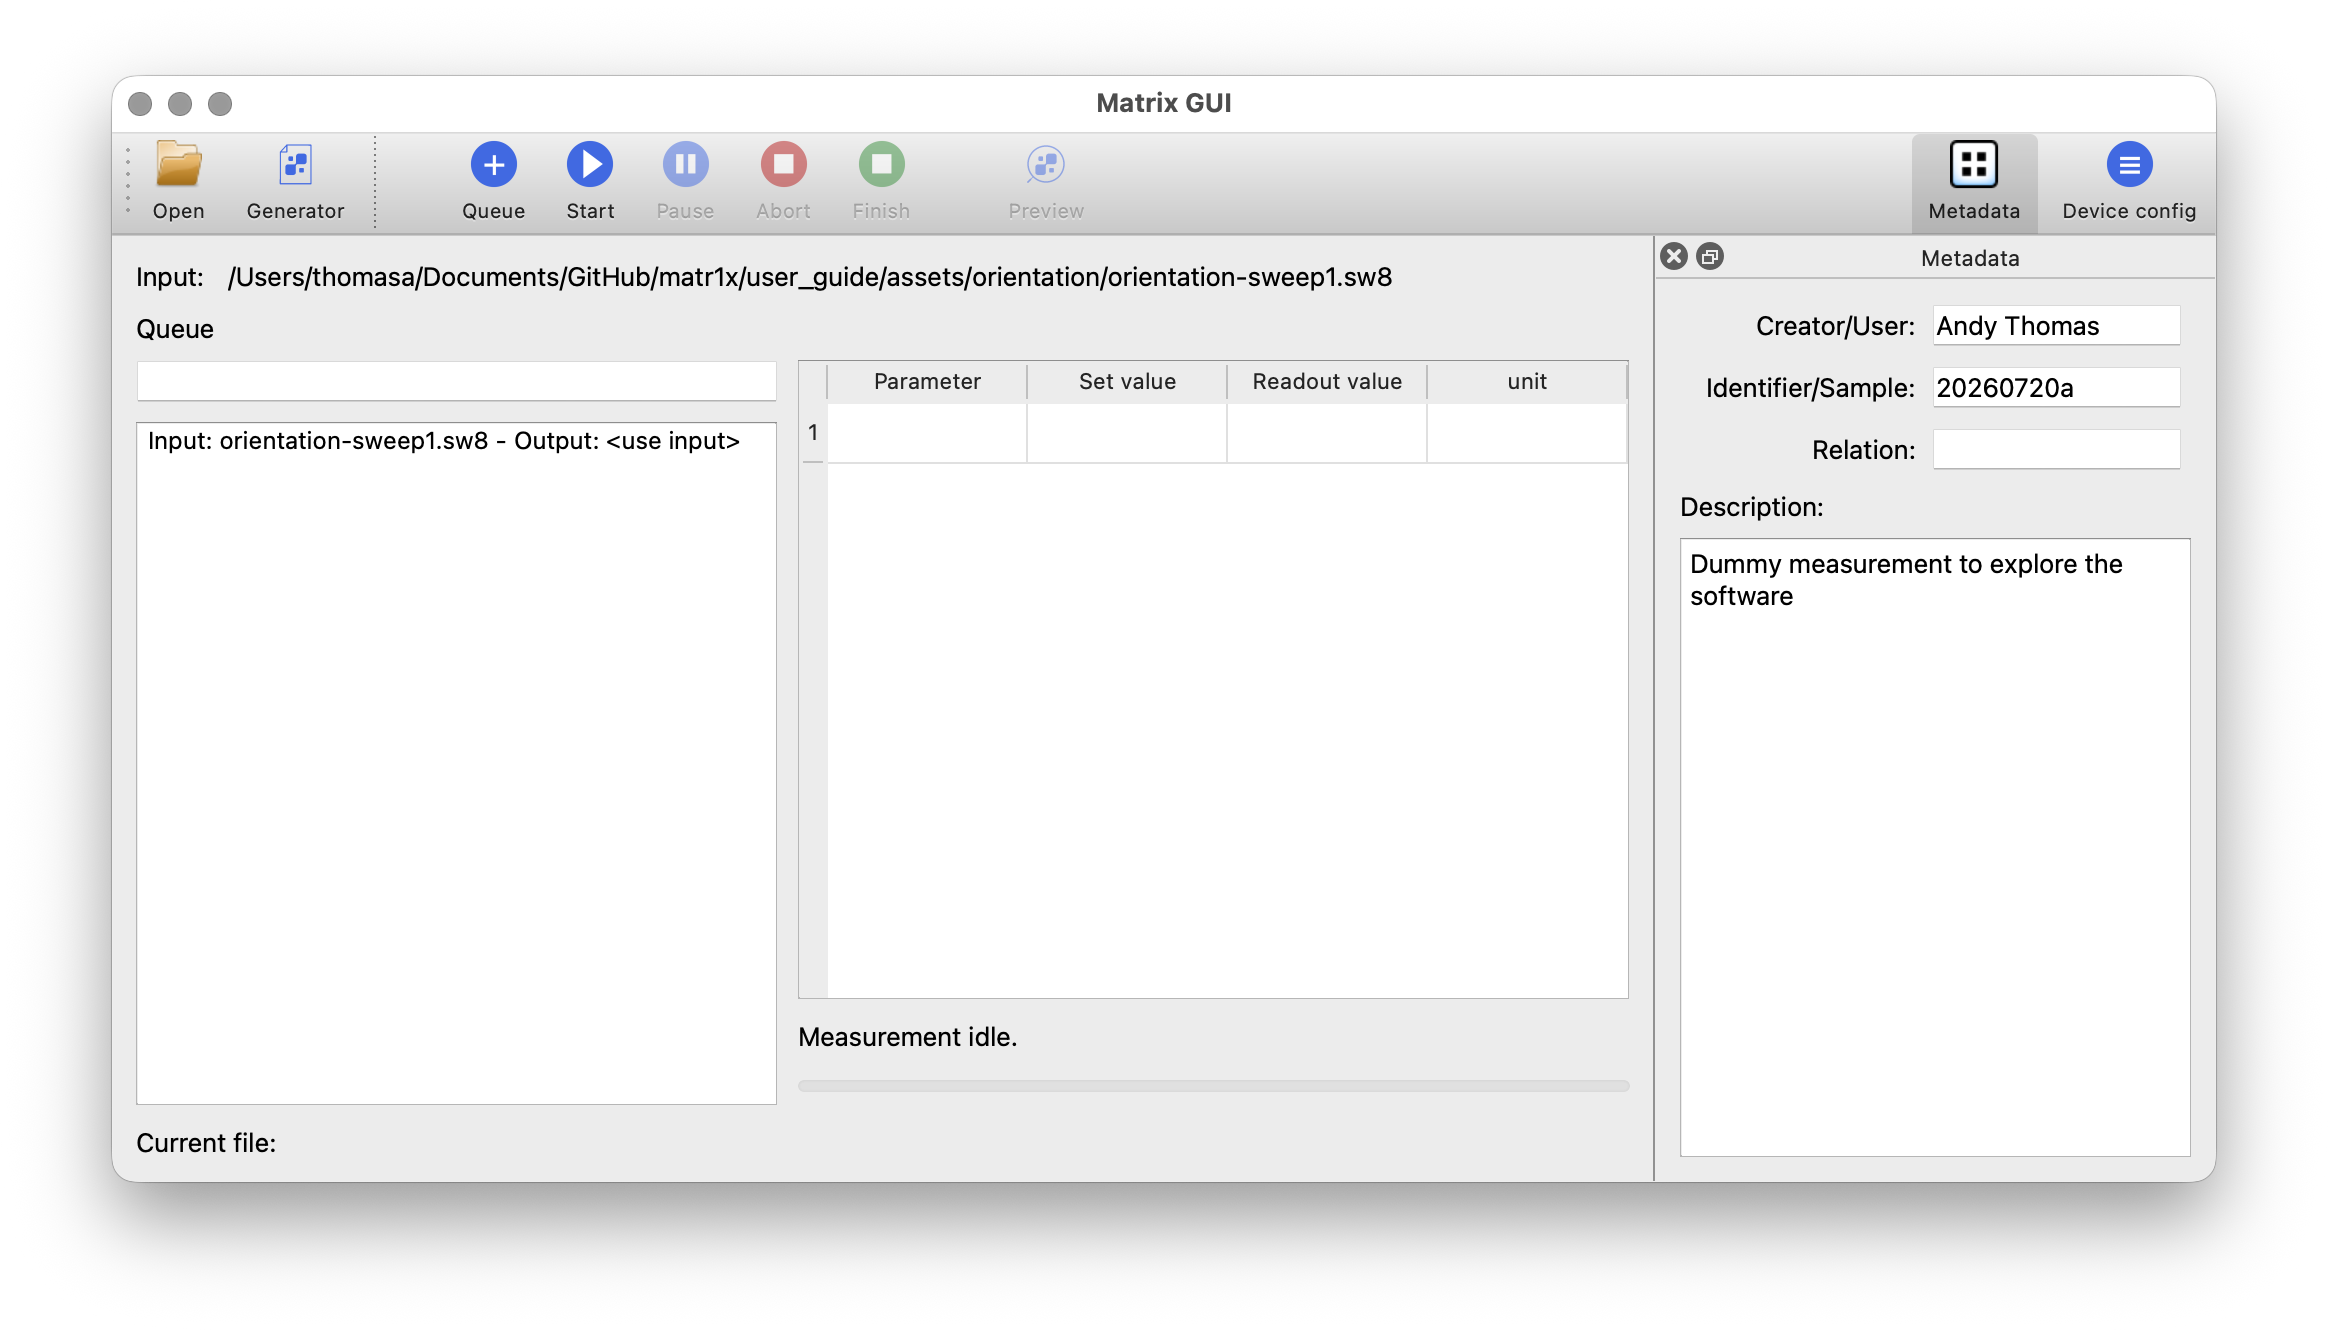 We enter more information to be saved as metadata (Creator, Identifier and a description) and press queue measurement. Pressing “Start” would now perform the measurement.
Script instrument control
If a more fine grained control is needed, a script can be used to control the device. The example shows the basic functionality. In a nutshell, any Python code plus a few custom commands for the device control and read-out can be used. 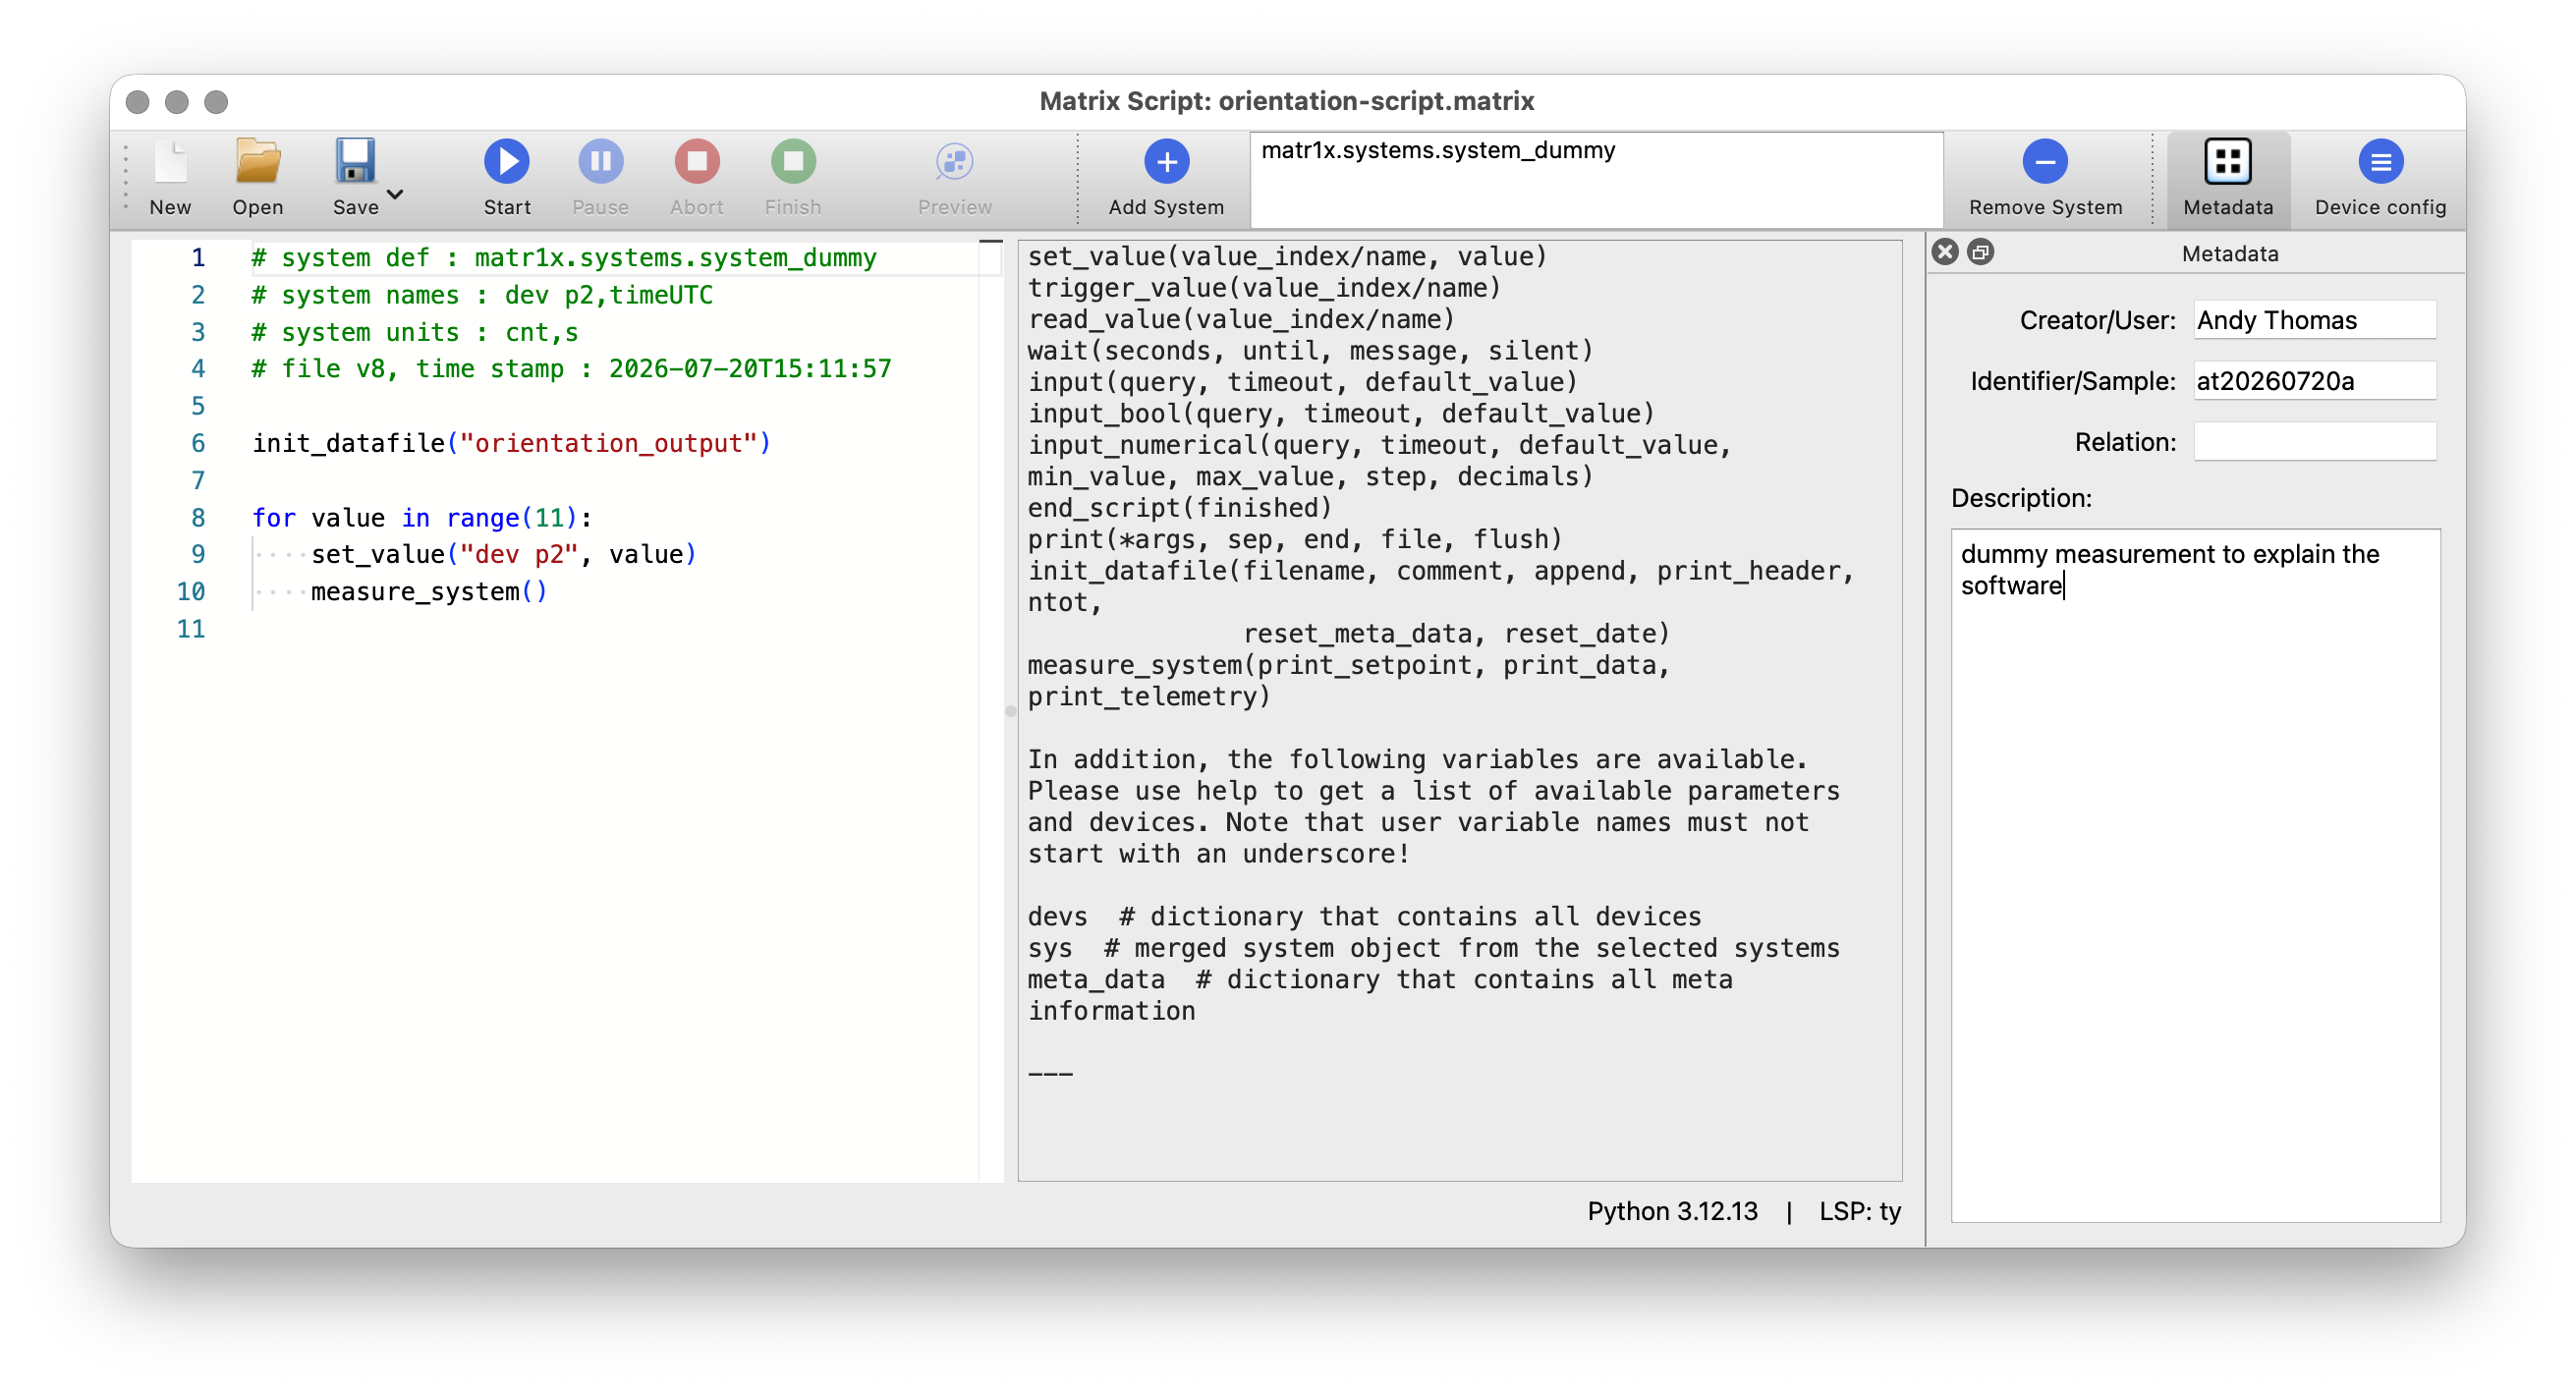 In our case, the values are swept from 0 to 10 in steps of 1. After each step, the a measurement is performed and the following lines illustrate the required coding effort.
init_datafile("orientation_output")

for value in range(11):
    set_value("dev p2", value)
    measure_system()
Data Preview
Matrix Preview can show the raw data from the measurement. Basic row selection, zooming and metadata inspection are available. 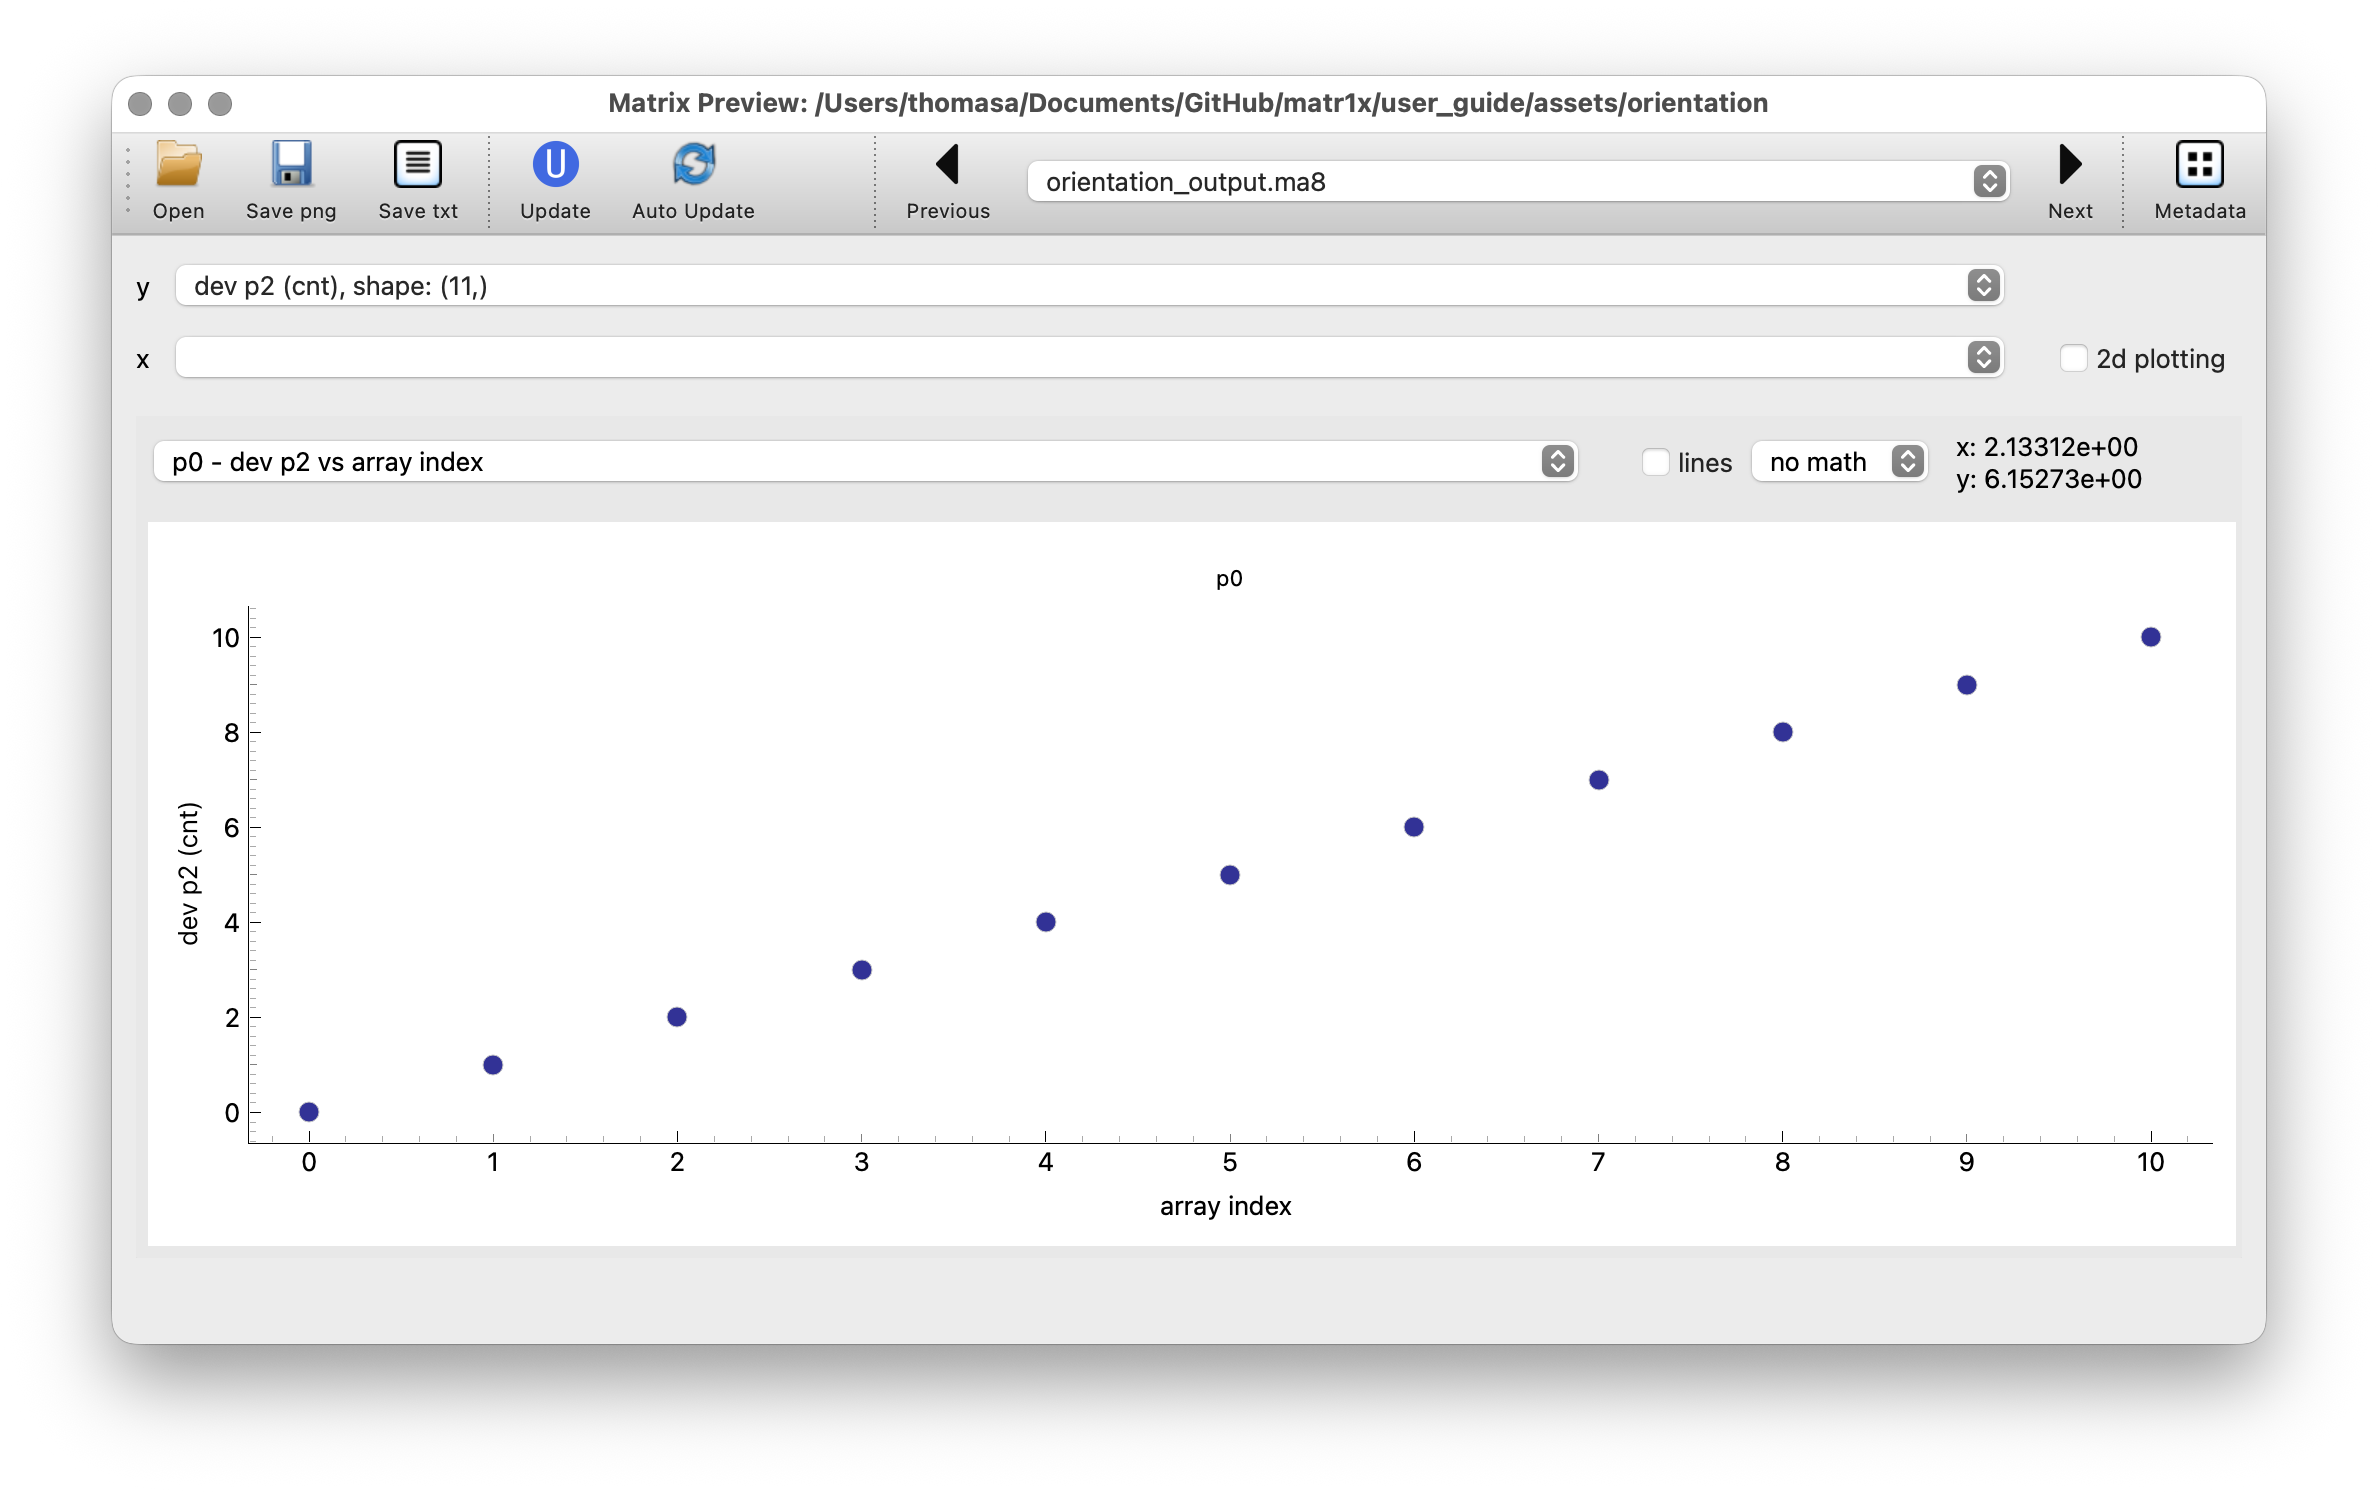 This concludes the orientation examples showcasing most of the basic functionality.